Layout com Flexbox
Um componente pode especificar o layout de seus filhos usando o algoritmo Flexbox. Flexbox foi projetado para fornecer um layout consistente em diferentes tamanhos de tela.
Normalmente, você usará uma combinação de flexDirection, alignItems e justifyContent para obter o layout correto.
CUIDADO
O Flexbox funciona no React Native da mesma maneira que no CSS na web, com algumas exceções. Os padrões são diferentes, com flexDirection padronizando para coluna em vez de linha, alignContent padronizando para flex-start em vez de stretch, flexShrink padronizando para 0 em vez de 1, o parâmetro flex suportando apenas um único número.
Flex
flex definirá como seus itens irão “preencher” o espaço disponível ao longo de seu eixo principal. O espaço será dividido de acordo com a propriedade flex de cada elemento.
No exemplo a seguir, as visualizações vermelha, laranja e verde são todas filhas na visualização do contêiner que possui flex: 1 definido. A visualização vermelha usa flex: 1 , a visualização laranja usa flex: 2 e a visualização verde usa flex: 3. 1+2+3 = 6, o que significa que a visualização vermelha obterá 1/6 do espaço, a laranja 2/6 do espaço e a verde 3/6 do espaço.
import React from 'react';
import {StyleSheet, View} from 'react-native';

const Flex = () => {
  return (
    <View
      style={[
        styles.container,
        {
          // Tente definir `flexDirection` como `"row"`.
          flexDirection: 'column',
        },
      ]}>
      <View style={{flex: 1, backgroundColor: 'red'}} />
      <View style={{flex: 2, backgroundColor: 'darkorange'}} />
      <View style={{flex: 3, backgroundColor: 'green'}} />
    </View>
  );
};

const styles = StyleSheet.create({
  container: {
    flex: 1,
    padding: 20,
  },
});

export default Flex;
Direção flexível
flexDirection controla a direção na qual os filhos de um nó são dispostos. Isso também é conhecido como eixo principal. O eixo transversal é o eixo perpendicular ao eixo principal, ou o eixo no qual as linhas de quebra são dispostas.
column(valor padrão) Alinhe os filhos de cima para baixo. Se o empacotamento estiver ativado, a próxima linha começará à direita do primeiro item na parte superior do contêiner.rowAlinhe os filhos da esquerda para a direita. Se o empacotamento estiver ativado, a próxima linha começará no primeiro item à esquerda do contêiner.column-reverseAlinhe os filhos de baixo para cima. Se o empacotamento estiver ativado, a próxima linha começará à direita do primeiro item na parte inferior do contêiner.row-reverseAlinha os filhos da direita para a esquerda. Se o empacotamento estiver ativado, a próxima linha começará no primeiro item à direita do contêiner.
Você pode aprender mais aqui.
import React, {useState} from 'react';
import {StyleSheet, Text, TouchableOpacity, View} from 'react-native';
import type {PropsWithChildren} from 'react';

const FlexDirectionBasics = () => {
  const [flexDirection, setflexDirection] = useState('column');

  return (
    <PreviewLayout
      label="flexDirection"
      values={['column', 'row', 'row-reverse', 'column-reverse']}
      selectedValue={flexDirection}
      setSelectedValue={setflexDirection}>
      <View style={[styles.box, {backgroundColor: 'powderblue'}]} />
      <View style={[styles.box, {backgroundColor: 'skyblue'}]} />
      <View style={[styles.box, {backgroundColor: 'steelblue'}]} />
    </PreviewLayout>
  );
};

type PreviewLayoutProps = PropsWithChildren<{
  label: string;
  values: string[];
  selectedValue: string;
  setSelectedValue: (value: string) => void;
}>;

const PreviewLayout = ({
  label,
  children,
  values,
  selectedValue,
  setSelectedValue,
}: PreviewLayoutProps) => (
  <View style={{padding: 10, flex: 1}}>
    <Text style={styles.label}>{label}</Text>
    <View style={styles.row}>
      {values.map(value => (
        <TouchableOpacity
          key={value}
          onPress={() => setSelectedValue(value)}
          style={[styles.button, selectedValue === value && styles.selected]}>
          <Text
            style={[
              styles.buttonLabel,
              selectedValue === value && styles.selectedLabel,
            ]}>
            {value}
          </Text>
        </TouchableOpacity>
      ))}
    </View>
    <View style={[styles.container, {[label]: selectedValue}]}>{children}</View>
  </View>
);

const styles = StyleSheet.create({
  container: {
    flex: 1,
    marginTop: 8,
    backgroundColor: 'aliceblue',
  },
  box: {
    width: 50,
    height: 50,
  },
  row: {
    flexDirection: 'row',
    flexWrap: 'wrap',
  },
  button: {
    paddingHorizontal: 8,
    paddingVertical: 6,
    borderRadius: 4,
    backgroundColor: 'oldlace',
    alignSelf: 'flex-start',
    marginHorizontal: '1%',
    marginBottom: 6,
    minWidth: '48%',
    textAlign: 'center',
  },
  selected: {
    backgroundColor: 'coral',
    borderWidth: 0,
  },
  buttonLabel: {
    fontSize: 12,
    fontWeight: '500',
    color: 'coral',
  },
  selectedLabel: {
    color: 'white',
  },
  label: {
    textAlign: 'center',
    marginBottom: 10,
    fontSize: 24,
  },
});

export default FlexDirectionBasics;
Direção do layout
A direção do layout especifica a direção na qual os filhos e o texto em uma hierarquia devem ser dispostos. A direção do layout também afeta a que ponto o início e o fim da borda se referem. Por padrão, o React Native apresenta a direção do layout LTR. Neste modo, o início refere-se à esquerda e o fim refere-se à direita.
LTR(valor padrão) O texto e os filhos são dispostos da esquerda para a direita. A margem e o preenchimento aplicados ao início de um elemento são aplicados no lado esquerdo.- O texto
RTLe os filhos são dispostos da direita para a esquerda. A margem e o preenchimento aplicados ao início de um elemento são aplicados no lado direito.
import React, {useState} from 'react';
import {View, TouchableOpacity, Text, StyleSheet} from 'react-native';
import type {PropsWithChildren} from 'react';

const DirectionLayout = () => {
  const [direction, setDirection] = useState('ltr');

  return (
    <PreviewLayout
      label="direction"
      selectedValue={direction}
      values={['ltr', 'rtl']}
      setSelectedValue={setDirection}>
      <View style={[styles.box, {backgroundColor: 'powderblue'}]} />
      <View style={[styles.box, {backgroundColor: 'skyblue'}]} />
      <View style={[styles.box, {backgroundColor: 'steelblue'}]} />
    </PreviewLayout>
  );
};

type PreviewLayoutProps = PropsWithChildren<{
  label: string;
  values: string[];
  selectedValue: string;
  setSelectedValue: (value: string) => void;
}>;

const PreviewLayout = ({
  label,
  children,
  values,
  selectedValue,
  setSelectedValue,
}: PreviewLayoutProps) => (
  <View style={{padding: 10, flex: 1}}>
    <Text style={styles.label}>{label}</Text>
    <View style={styles.row}>
      {values.map(value => (
        <TouchableOpacity
          key={value}
          onPress={() => setSelectedValue(value)}
          style={[styles.button, selectedValue === value && styles.selected]}>
          <Text
            style={[
              styles.buttonLabel,
              selectedValue === value && styles.selectedLabel,
            ]}>
            {value}
          </Text>
        </TouchableOpacity>
      ))}
    </View>
    <View style={[styles.container, {[label]: selectedValue}]}>{children}</View>
  </View>
);

const styles = StyleSheet.create({
  container: {
    flex: 1,
    marginTop: 8,
    backgroundColor: 'aliceblue',
  },
  box: {
    width: 50,
    height: 50,
  },
  row: {
    flexDirection: 'row',
    flexWrap: 'wrap',
  },
  button: {
    paddingHorizontal: 8,
    paddingVertical: 6,
    borderRadius: 4,
    backgroundColor: 'oldlace',
    alignSelf: 'flex-start',
    marginHorizontal: '1%',
    marginBottom: 6,
    minWidth: '48%',
    textAlign: 'center',
  },
  selected: {
    backgroundColor: 'coral',
    borderWidth: 0,
  },
  buttonLabel: {
    fontSize: 12,
    fontWeight: '500',
    color: 'coral',
  },
  selectedLabel: {
    color: 'white',
  },
  label: {
    textAlign: 'center',
    marginBottom: 10,
    fontSize: 24,
  },
});

export default DirectionLayout;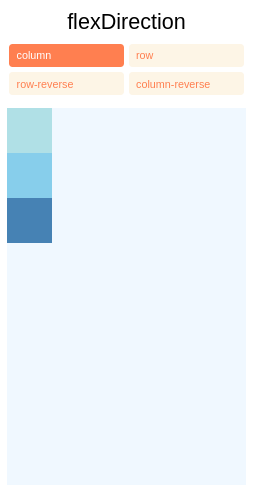
Justificar o conteúdo
justifyContent descreve como alinhar filhos dentro do eixo principal de seu contêiner. Por exemplo, você pode usar essa propriedade para centralizar um filho horizontalmente em um contêiner com flexDirection definido como linha ou verticalmente em um contêiner com flexDirection definido como coluna.
flex-start(valor padrão) Alinha os filhos de um contêiner ao início do eixo principal do contêiner.flex-endAlinha os filhos de um contêiner ao final do eixo principal do contêiner.centerAlinha os filhos de um contêiner no centro do eixo principal do contêiner.space-betweenEspaçar uniformemente os filhos no eixo principal do contêiner, distribuindo o espaço restante entre os filhos.space-aroundAfaste uniformemente os filhos no eixo principal do contêiner, distribuindo o espaço restante ao redor dos filhos. Comparado ao espaço entre, usar o espaço ao redor resultará na distribuição do espaço para o início do primeiro filho e o final do último filho.
space-evenly Distribua uniformemente os filhos dentro do contêiner de alinhamento ao longo do eixo principal. O espaçamento entre cada par de itens adjacentes, a borda inicial principal e o primeiro item, e a borda final principal e o último item, são todos exatamente iguais.
Você pode aprender mais aqui.
import React, {useState} from 'react';
import {View, TouchableOpacity, Text, StyleSheet} from 'react-native';
import type {PropsWithChildren} from 'react';

const JustifyContentBasics = () => {
  const [justifyContent, setJustifyContent] = useState('flex-start');

  return (
    <PreviewLayout
      label="justifyContent"
      selectedValue={justifyContent}
      values={[
        'flex-start',
        'flex-end',
        'center',
        'space-between',
        'space-around',
        'space-evenly',
      ]}
      setSelectedValue={setJustifyContent}>
      <View style={[styles.box, {backgroundColor: 'powderblue'}]} />
      <View style={[styles.box, {backgroundColor: 'skyblue'}]} />
      <View style={[styles.box, {backgroundColor: 'steelblue'}]} />
    </PreviewLayout>
  );
};

type PreviewLayoutProps = PropsWithChildren<{
  label: string;
  values: string[];
  selectedValue: string;
  setSelectedValue: (value: string) => void;
}>;

const PreviewLayout = ({
  label,
  children,
  values,
  selectedValue,
  setSelectedValue,
}: PreviewLayoutProps) => (
  <View style={{padding: 10, flex: 1}}>
    <Text style={styles.label}>{label}</Text>
    <View style={styles.row}>
      {values.map(value => (
        <TouchableOpacity
          key={value}
          onPress={() => setSelectedValue(value)}
          style={[styles.button, selectedValue === value && styles.selected]}>
          <Text
            style={[
              styles.buttonLabel,
              selectedValue === value && styles.selectedLabel,
            ]}>
            {value}
          </Text>
        </TouchableOpacity>
      ))}
    </View>
    <View style={[styles.container, {[label]: selectedValue}]}>{children}</View>
  </View>
);

const styles = StyleSheet.create({
  container: {
    flex: 1,
    marginTop: 8,
    backgroundColor: 'aliceblue',
  },
  box: {
    width: 50,
    height: 50,
  },
  row: {
    flexDirection: 'row',
    flexWrap: 'wrap',
  },
  button: {
    paddingHorizontal: 8,
    paddingVertical: 6,
    borderRadius: 4,
    backgroundColor: 'oldlace',
    alignSelf: 'flex-start',
    marginHorizontal: '1%',
    marginBottom: 6,
    minWidth: '48%',
    textAlign: 'center',
  },
  selected: {
    backgroundColor: 'coral',
    borderWidth: 0,
  },
  buttonLabel: {
    fontSize: 12,
    fontWeight: '500',
    color: 'coral',
  },
  selectedLabel: {
    color: 'white',
  },
  label: {
    textAlign: 'center',
    marginBottom: 10,
    fontSize: 24,
  },
});

export default JustifyContentBasics;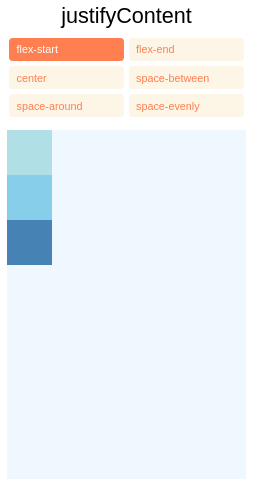
Alinhar itens
alignItems descreve como alinhar filhos ao longo do eixo cruzado de seu contêiner. É muito semelhante a justifyContent, mas em vez de aplicar ao eixo principal, alignItems aplica-se ao eixo cruzado.
stretch(valor padrão) Alonga os filhos de um contêiner para corresponder à altura do eixo transversal do contêiner.flex-startAlinha os filhos de um contêiner ao início do eixo cruzado do contêiner.flex-endAlinha os filhos de um contêiner ao final do eixo transversal do contêiner.centerAlinhe os filhos de um contêiner no centro do eixo transversal do contêiner.baselineAlinha os filhos de um contêiner ao longo de uma linha de base comum. Cada criança pode ser definida como referência para seus pais.
INFORMAÇÕES
Para que o stretch tenha efeito, as crianças não devem ter uma dimensão fixa ao longo do eixo secundário. No exemplo a seguir, a configuração de alignItems: stretch não faz nada até que width: 50 seja removido dos filhos.
Você pode aprender mais aqui.
import React, {useState} from 'react';
import {View, TouchableOpacity, Text, StyleSheet} from 'react-native';
import type {PropsWithChildren} from 'react';

const AlignItemsLayout = () => {
  const [alignItems, setAlignItems] = useState('stretch');

  return (
    <PreviewLayout
      label="alignItems"
      selectedValue={alignItems}
      values={['stretch', 'flex-start', 'flex-end', 'center', 'baseline']}
      setSelectedValue={setAlignItems}>
      <View style={[styles.box, {backgroundColor: 'powderblue'}]} />
      <View style={[styles.box, {backgroundColor: 'skyblue'}]} />
      <View
        style={[
          styles.box,
          {
            backgroundColor: 'steelblue',
            width: 'auto',
            minWidth: 50,
          },
        ]}
      />
    </PreviewLayout>
  );
};

type PreviewLayoutProps = PropsWithChildren<{
  label: string;
  values: string[];
  selectedValue: string;
  setSelectedValue: (value: string) => void;
}>;

const PreviewLayout = ({
  label,
  children,
  values,
  selectedValue,
  setSelectedValue,
}: PreviewLayoutProps) => (
  <View style={{padding: 10, flex: 1}}>
    <Text style={styles.label}>{label}</Text>
    <View style={styles.row}>
      {values.map(value => (
        <TouchableOpacity
          key={value}
          onPress={() => setSelectedValue(value)}
          style={[styles.button, selectedValue === value && styles.selected]}>
          <Text
            style={[
              styles.buttonLabel,
              selectedValue === value && styles.selectedLabel,
            ]}>
            {value}
          </Text>
        </TouchableOpacity>
      ))}
    </View>
    <View style={[styles.container, {[label]: selectedValue}]}>{children}</View>
  </View>
);

const styles = StyleSheet.create({
  container: {
    flex: 1,
    marginTop: 8,
    backgroundColor: 'aliceblue',
    minHeight: 200,
  },
  box: {
    width: 50,
    height: 50,
  },
  row: {
    flexDirection: 'row',
    flexWrap: 'wrap',
  },
  button: {
    paddingHorizontal: 8,
    paddingVertical: 6,
    borderRadius: 4,
    backgroundColor: 'oldlace',
    alignSelf: 'flex-start',
    marginHorizontal: '1%',
    marginBottom: 6,
    minWidth: '48%',
    textAlign: 'center',
  },
  selected: {
    backgroundColor: 'coral',
    borderWidth: 0,
  },
  buttonLabel: {
    fontSize: 12,
    fontWeight: '500',
    color: 'coral',
  },
  selectedLabel: {
    color: 'white',
  },
  label: {
    textAlign: 'center',
    marginBottom: 10,
    fontSize: 24,
  },
});

export default AlignItemsLayout;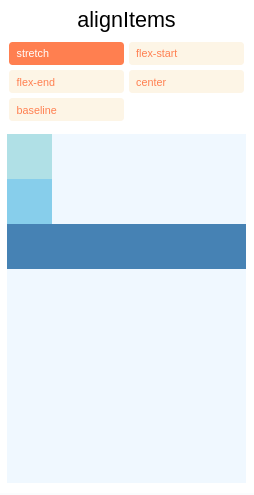
Alinhar-se
alignSelf tem as mesmas opções e efeitos que alignItems, mas em vez de afetar os filhos dentro de um contêiner, você pode aplicar essa propriedade a um único filho para alterar seu alinhamento dentro de seu pai. alignSelf substitui qualquer opção definida pelo pai com alignItems.
import React, {useState} from 'react';
import {View, TouchableOpacity, Text, StyleSheet} from 'react-native';
import type {PropsWithChildren} from 'react';
import type {FlexAlignType} from 'react-native';

const AlignSelfLayout = () => {
  const [alignSelf, setAlignSelf] = useState<FlexAlignType>('stretch');

  return (
    <PreviewLayout
      label="alignSelf"
      selectedValue={alignSelf}
      values={['stretch', 'flex-start', 'flex-end', 'center', 'baseline']}
      setSelectedValue={setAlignSelf}>
      <View
        style={[
          styles.box,
          {
            alignSelf,
            width: 'auto',
            minWidth: 50,
            backgroundColor: 'powderblue',
          },
        ]}
      />
      <View style={[styles.box, {backgroundColor: 'skyblue'}]} />
      <View style={[styles.box, {backgroundColor: 'steelblue'}]} />
    </PreviewLayout>
  );
};

type PreviewLayoutProps = PropsWithChildren<{
  label: string;
  values: FlexAlignType[];
  selectedValue: string;
  setSelectedValue: (value: FlexAlignType) => void;
}>;

const PreviewLayout = ({
  label,
  children,
  values,
  selectedValue,
  setSelectedValue,
}: PreviewLayoutProps) => (
  <View style={{padding: 10, flex: 1}}>
    <Text style={styles.label}>{label}</Text>
    <View style={styles.row}>
      {values.map(value => (
        <TouchableOpacity
          key={value}
          onPress={() => setSelectedValue(value)}
          style={[styles.button, selectedValue === value && styles.selected]}>
          <Text
            style={[
              styles.buttonLabel,
              selectedValue === value && styles.selectedLabel,
            ]}>
            {value}
          </Text>
        </TouchableOpacity>
      ))}
    </View>
    <View style={styles.container}>{children}</View>
  </View>
);

const styles = StyleSheet.create({
  container: {
    flex: 1,
    marginTop: 8,
    backgroundColor: 'aliceblue',
    minHeight: 200,
  },
  box: {
    width: 50,
    height: 50,
  },
  row: {
    flexDirection: 'row',
    flexWrap: 'wrap',
  },
  button: {
    paddingHorizontal: 8,
    paddingVertical: 6,
    borderRadius: 4,
    backgroundColor: 'oldlace',
    alignSelf: 'flex-start',
    marginHorizontal: '1%',
    marginBottom: 6,
    minWidth: '48%',
    textAlign: 'center',
  },
  selected: {
    backgroundColor: 'coral',
    borderWidth: 0,
  },
  buttonLabel: {
    fontSize: 12,
    fontWeight: '500',
    color: 'coral',
  },
  selectedLabel: {
    color: 'white',
  },
  label: {
    textAlign: 'center',
    marginBottom: 10,
    fontSize: 24,
  },
});

export default AlignSelfLayout;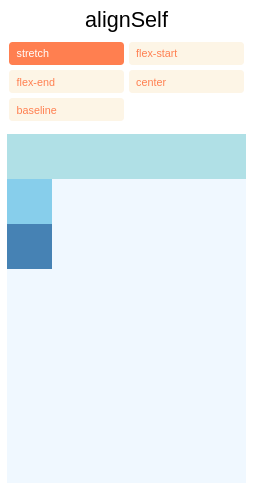
Alinhar conteúdo
alignContent define a distribuição de linhas ao longo do eixo cruzado. Isso só tem efeito quando os itens são agrupados em várias linhas usando flexWrap.
flex-start(valor padrão) Alinha as linhas quebradas ao início do eixo cruzado do contêiner.flex-endAlinhe as linhas quebradas ao final do eixo cruzado do contêiner.stretch(valor padrão ao usar o Yoga na Web) Estica as linhas quebradas para corresponder à altura do eixo transversal do contêiner.centerAlinhe as linhas quebradas no centro do eixo transversal do contêiner.space-betweenEspaçar uniformemente as linhas agrupadas ao longo do eixo cruzado do contêiner, distribuindo o espaço restante entre as linhas.space-aroundEspaça uniformemente as linhas quebradas ao longo do eixo cruzado do contêiner, distribuindo o espaço restante ao redor das linhas. Comparado aospace-between, usarspace-aroundresultará na distribuição do espaço no início da primeira linha e no final da última linha.
Você pode aprender mais aqui.
import React, {useState} from 'react';
import {View, TouchableOpacity, Text, StyleSheet} from 'react-native';
import type {PropsWithChildren} from 'react';

const AlignContentLayout = () => {
  const [alignContent, setAlignContent] = useState('flex-start');

  return (
    <PreviewLayout
      label="alignContent"
      selectedValue={alignContent}
      values={[
        'flex-start',
        'flex-end',
        'stretch',
        'center',
        'space-between',
        'space-around',
      ]}
      setSelectedValue={setAlignContent}>
      <View style={[styles.box, {backgroundColor: 'orangered'}]} />
      <View style={[styles.box, {backgroundColor: 'orange'}]} />
      <View style={[styles.box, {backgroundColor: 'mediumseagreen'}]} />
      <View style={[styles.box, {backgroundColor: 'deepskyblue'}]} />
      <View style={[styles.box, {backgroundColor: 'mediumturquoise'}]} />
      <View style={[styles.box, {backgroundColor: 'mediumslateblue'}]} />
      <View style={[styles.box, {backgroundColor: 'purple'}]} />
    </PreviewLayout>
  );
};

type PreviewLayoutProps = PropsWithChildren<{
  label: string;
  values: string[];
  selectedValue: string;
  setSelectedValue: (value: string) => void;
}>;

const PreviewLayout = ({
  label,
  children,
  values,
  selectedValue,
  setSelectedValue,
}: PreviewLayoutProps) => (
  <View style={{padding: 10, flex: 1}}>
    <Text style={styles.label}>{label}</Text>
    <View style={styles.row}>
      {values.map(value => (
        <TouchableOpacity
          key={value}
          onPress={() => setSelectedValue(value)}
          style={[styles.button, selectedValue === value && styles.selected]}>
          <Text
            style={[
              styles.buttonLabel,
              selectedValue === value && styles.selectedLabel,
            ]}>
            {value}
          </Text>
        </TouchableOpacity>
      ))}
    </View>
    <View style={[styles.container, {[label]: selectedValue}]}>{children}</View>
  </View>
);

const styles = StyleSheet.create({
  container: {
    flex: 1,
    flexWrap: 'wrap',
    marginTop: 8,
    backgroundColor: 'aliceblue',
    maxHeight: 400,
  },
  box: {
    width: 50,
    height: 80,
  },
  row: {
    flexDirection: 'row',
    flexWrap: 'wrap',
  },
  button: {
    paddingHorizontal: 8,
    paddingVertical: 6,
    borderRadius: 4,
    backgroundColor: 'oldlace',
    alignSelf: 'flex-start',
    marginHorizontal: '1%',
    marginBottom: 6,
    minWidth: '48%',
    textAlign: 'center',
  },
  selected: {
    backgroundColor: 'coral',
    borderWidth: 0,
  },
  buttonLabel: {
    fontSize: 12,
    fontWeight: '500',
    color: 'coral',
  },
  selectedLabel: {
    color: 'white',
  },
  label: {
    textAlign: 'center',
    marginBottom: 10,
    fontSize: 24,
  },
});

export default AlignContentLayout;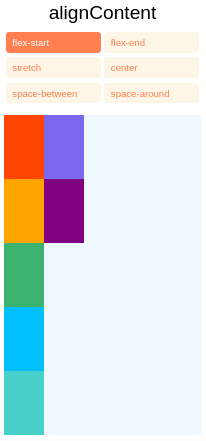
Flex Wrap
A propriedade flexWrap é definida em contêineres e controla o que acontece quando os filhos excedem o tamanho do contêiner ao longo do eixo principal. Por padrão, os filhos são forçados a formar uma única linha (o que pode reduzir os elementos). Se o agrupamento for permitido, os itens serão agrupados em diversas linhas ao longo do eixo principal, se necessário.
Ao agrupar linhas, alignContent pode ser usado para especificar como as linhas são colocadas no contêiner. Saiba mais aqui.
import React, {useState} from 'react';
import {View, TouchableOpacity, Text, StyleSheet} from 'react-native';
import type {PropsWithChildren} from 'react';

const FlexWrapLayout = () => {
  const [flexWrap, setFlexWrap] = useState('wrap');

  return (
    <PreviewLayout
      label="flexWrap"
      selectedValue={flexWrap}
      values={['wrap', 'nowrap']}
      setSelectedValue={setFlexWrap}>
      <View style={[styles.box, {backgroundColor: 'orangered'}]} />
      <View style={[styles.box, {backgroundColor: 'orange'}]} />
      <View style={[styles.box, {backgroundColor: 'mediumseagreen'}]} />
      <View style={[styles.box, {backgroundColor: 'deepskyblue'}]} />
      <View style={[styles.box, {backgroundColor: 'mediumturquoise'}]} />
      <View style={[styles.box, {backgroundColor: 'mediumslateblue'}]} />
      <View style={[styles.box, {backgroundColor: 'purple'}]} />
    </PreviewLayout>
  );
};

type PreviewLayoutProps = PropsWithChildren<{
  label: string;
  values: string[];
  selectedValue: string;
  setSelectedValue: (value: string) => void;
}>;

const PreviewLayout = ({
  label,
  children,
  values,
  selectedValue,
  setSelectedValue,
}: PreviewLayoutProps) => (
  <View style={{padding: 10, flex: 1}}>
    <Text style={styles.label}>{label}</Text>
    <View style={styles.row}>
      {values.map(value => (
        <TouchableOpacity
          key={value}
          onPress={() => setSelectedValue(value)}
          style={[styles.button, selectedValue === value && styles.selected]}>
          <Text
            style={[
              styles.buttonLabel,
              selectedValue === value && styles.selectedLabel,
            ]}>
            {value}
          </Text>
        </TouchableOpacity>
      ))}
    </View>
    <View style={[styles.container, {[label]: selectedValue}]}>{children}</View>
  </View>
);

const styles = StyleSheet.create({
  container: {
    flex: 1,
    marginTop: 8,
    backgroundColor: 'aliceblue',
    maxHeight: 400,
  },
  box: {
    width: 50,
    height: 80,
  },
  row: {
    flexDirection: 'row',
    flexWrap: 'wrap',
  },
  button: {
    paddingHorizontal: 8,
    paddingVertical: 6,
    borderRadius: 4,
    backgroundColor: 'oldlace',
    marginHorizontal: '1%',
    marginBottom: 6,
    minWidth: '48%',
    textAlign: 'center',
  },
  selected: {
    backgroundColor: 'coral',
    borderWidth: 0,
  },
  buttonLabel: {
    fontSize: 12,
    fontWeight: '500',
    color: 'coral',
  },
  selectedLabel: {
    color: 'white',
  },
  label: {
    textAlign: 'center',
    marginBottom: 10,
    fontSize: 24,
  },
});

export default FlexWrapLayout;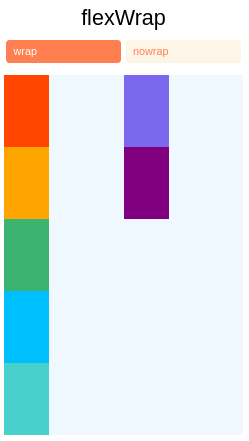
Base Flexível, Crescer e Encolher
flexBasisé uma forma independente de eixo de fornecer o tamanho padrão de um item ao longo do eixo principal. Definir oflexBasisde um filho é semelhante a definir owidthdesse filho se seu pai for um contêiner comflexDirection: rowou definir oheightde um filho se seu pai for um contêiner comflexDirection: column. OflexBasisde um item é o tamanho padrão desse item, o tamanho do item antes de qualquer cálculo deflexGroweflexShrinkser executado.flexGrowdescreve quanto espaço dentro de um contêiner deve ser distribuído entre seus filhos ao longo do eixo principal. Depois de dispor seus filhos, um contêiner distribuirá qualquer espaço restante de acordo com os valores flex grow especificados por seus filhos.
flexGrow aceita qualquer valor de ponto flutuante >= 0, sendo 0 o valor padrão. Um contêiner distribuirá qualquer espaço restante entre seus filhos, ponderado pelos valores flexGrow dos filhos.
flexShrinkdescreve como reduzir os filhos ao longo do eixo principal no caso em que o tamanho total dos filhos excede o tamanho do contêiner no eixo principal.flexShrinké muito semelhante aoflexGrowe pode ser pensado da mesma maneira se qualquer tamanho excedente for considerado espaço restante negativo. Essas duas propriedades também funcionam bem juntas, permitindo que as crianças cresçam e diminuam conforme necessário.
flexShrink aceita qualquer valor de ponto flutuante >= 0, sendo 0 o valor padrão (na web, o padrão é 1). Um contêiner reduzirá seus filhos ponderados pelos valores flexShrink dos filhos.
Você pode aprender mais aqui.
import React, {useState} from 'react';
import {View, Text, TextInput, StyleSheet} from 'react-native';
import type {ViewStyle} from 'react-native';

const App = () => {
  const [powderblue, setPowderblue] = useState<ViewStyle>({
    flexGrow: 0,
    flexShrink: 1,
    flexBasis: 'auto',
  });
  const [skyblue, setSkyblue] = useState<ViewStyle>({
    flexGrow: 1,
    flexShrink: 0,
    flexBasis: 100,
  });
  const [steelblue, setSteelblue] = useState<ViewStyle>({
    flexGrow: 0,
    flexShrink: 1,
    flexBasis: 200,
  });
  return (
    <View style={styles.container}>
      <View
        style={[
          styles.container,
          {
            flexDirection: 'row',
            alignContent: 'space-between',
          },
        ]}>
        <BoxInfo color="powderblue" {...powderblue} setStyle={setPowderblue} />
        <BoxInfo color="skyblue" {...skyblue} setStyle={setSkyblue} />
        <BoxInfo color="steelblue" {...steelblue} setStyle={setSteelblue} />
      </View>
      <View style={styles.previewContainer}>
        <View
          style={[
            styles.box,
            {
              flexBasis: powderblue.flexBasis,
              flexGrow: powderblue.flexGrow,
              flexShrink: powderblue.flexShrink,
              backgroundColor: 'powderblue',
            },
          ]}
        />
        <View
          style={[
            styles.box,
            {
              flexBasis: skyblue.flexBasis,
              flexGrow: skyblue.flexGrow,
              flexShrink: skyblue.flexShrink,
              backgroundColor: 'skyblue',
            },
          ]}
        />
        <View
          style={[
            styles.box,
            {
              flexBasis: steelblue.flexBasis,
              flexGrow: steelblue.flexGrow,
              flexShrink: steelblue.flexShrink,
              backgroundColor: 'steelblue',
            },
          ]}
        />
      </View>
    </View>
  );
};

type BoxInfoProps = ViewStyle & {
  color: string;
  setStyle: React.Dispatch<React.SetStateAction<ViewStyle>>;
};

const BoxInfo = ({
  color,
  flexBasis,
  flexShrink,
  setStyle,
  flexGrow,
}: BoxInfoProps) => (
  <View style={[styles.row, {flexDirection: 'column'}]}>
    <View
      style={[
        styles.boxLabel,
        {
          backgroundColor: color,
        },
      ]}>
      <Text
        style={{
          color: '#fff',
          fontWeight: '500',
          textAlign: 'center',
        }}>
        Box
      </Text>
    </View>
    <Text style={styles.label}>flexBasis</Text>
    <TextInput
      value={String(flexBasis)}
      style={styles.input}
      onChangeText={fB =>
        setStyle(value => ({
          ...value,
          flexBasis: isNaN(parseInt(fB, 10)) ? 'auto' : parseInt(fB, 10),
        }))
      }
    />
    <Text style={styles.label}>flexShrink</Text>
    <TextInput
      value={String(flexShrink)}
      style={styles.input}
      onChangeText={fS =>
        setStyle(value => ({
          ...value,
          flexShrink: isNaN(parseInt(fS, 10)) ? undefined : parseInt(fS, 10),
        }))
      }
    />
    <Text style={styles.label}>flexGrow</Text>
    <TextInput
      value={String(flexGrow)}
      style={styles.input}
      onChangeText={fG =>
        setStyle(value => ({
          ...value,
          flexGrow: isNaN(parseInt(fG, 10)) ? undefined : parseInt(fG, 10),
        }))
      }
    />
  </View>
);

const styles = StyleSheet.create({
  container: {
    flex: 1,
    paddingHorizontal: 10,
  },
  box: {
    flex: 1,
    height: 50,
    width: 50,
  },
  boxLabel: {
    minWidth: 80,
    padding: 8,
    borderRadius: 4,
    marginTop: 8,
  },
  label: {
    marginTop: 6,
    fontSize: 16,
    fontWeight: '100',
  },
  previewContainer: {
    flex: 1,
    flexDirection: 'row',
    backgroundColor: 'aliceblue',
  },
  row: {
    flex: 1,
    flexDirection: 'row',
    flexWrap: 'wrap',
    alignItems: 'center',
    marginBottom: 10,
  },
  input: {
    borderBottomWidth: 1,
    paddingVertical: 3,
    width: 50,
    textAlign: 'center',
  },
});

export default App;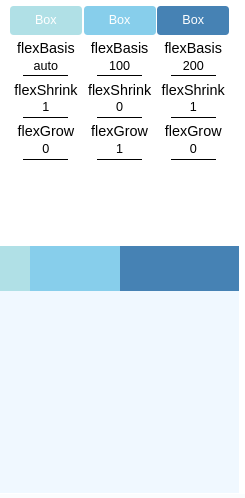
Lacuna de linha, lacuna de coluna e lacuna
rowGapdefine o tamanho da lacuna (gutter) entre as linhas de um elemento.columnGapdefine o tamanho da lacuna (gutter) entre as colunas de um elemento.gapdefine o tamanho do intervalo (gutter) entre linhas e colunas. É uma abreviação derowGapecolumnGap.
Você pode usar flexWrap e alignContent junto com gap para adicionar espaçamento consistente entre os itens.
import React, {useState} from 'react';
import {View, Text, StyleSheet, TextInput} from 'react-native';
import type {PropsWithChildren} from 'react';

const RowGapAndColumnGap = () => {
  const [rowGap, setRowGap] = useState(10);
  const [columnGap, setColumnGap] = useState(10);

  return (
    <PreviewLayout
      columnGap={columnGap}
      handleColumnGapChange={setColumnGap}
      rowGap={rowGap}
      handleRowGapChange={setRowGap}>
      <View style={[styles.box, styles.box1]} />
      <View style={[styles.box, styles.box2]} />
      <View style={[styles.box, styles.box3]} />
      <View style={[styles.box, styles.box4]} />
      <View style={[styles.box, styles.box5]} />
    </PreviewLayout>
  );
};

type PreviewLayoutProps = PropsWithChildren<{
  columnGap: number;
  handleColumnGapChange: (gap: number) => void;
  rowGap: number;
  handleRowGapChange: (gap: number) => void;
}>;

const PreviewLayout = ({
  children,
  handleColumnGapChange,
  handleRowGapChange,
  rowGap,
  columnGap,
}: PreviewLayoutProps) => (
  <View style={styles.previewContainer}>
    <View style={styles.inputContainer}>
      <View style={styles.itemsCenter}>
        <Text>Row Gap</Text>
        <TextInput
          style={styles.input}
          value={String(rowGap)}
          onChangeText={v => handleRowGapChange(Number(v))}
        />
      </View>
      <View style={styles.itemsCenter}>
        <Text>Column Gap</Text>
        <TextInput
          style={styles.input}
          value={String(columnGap)}
          onChangeText={v => handleColumnGapChange(Number(v))}
        />
      </View>
    </View>
    <View style={[styles.container, {rowGap, columnGap}]}>{children}</View>
  </View>
);

const styles = StyleSheet.create({
  itemsCenter: {alignItems: 'center'},
  inputContainer: {
    gap: 4,
    flexDirection: 'row',
    justifyContent: 'space-around',
  },
  previewContainer: {padding: 10, flex: 1},
  input: {
    borderBottomWidth: 1,
    paddingVertical: 3,
    width: 50,
    textAlign: 'center',
  },
  container: {
    flex: 1,
    marginTop: 8,
    backgroundColor: 'aliceblue',
    maxHeight: 400,
    flexWrap: 'wrap',
    alignContent: 'flex-start',
  },
  box: {
    width: 50,
    height: 80,
  },
  box1: {
    backgroundColor: 'orangered',
  },
  box2: {
    backgroundColor: 'orange',
  },
  box3: {
    backgroundColor: 'mediumseagreen',
  },
  box4: {
    backgroundColor: 'deepskyblue',
  },
  box5: {
    backgroundColor: 'mediumturquoise',
  },
});

export default RowGapAndColumnGap;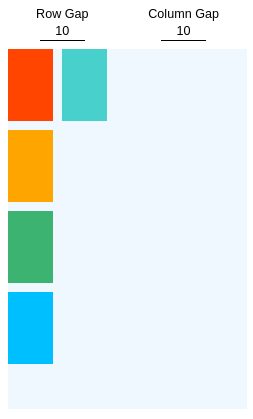
Largura e altura
A propriedade width especifica a largura da área de conteúdo de um elemento. Da mesma forma, a propriedade height especifica a altura da área de conteúdo de um elemento.
Tanto a largura quanto a altura podem assumir os seguintes valores:
auto(valor padrão) React Native calcula a largura/altura do elemento com base em seu conteúdo, seja ele outros filhos, texto ou uma imagem.pixelsDefine a largura/altura em pixels absolutos. Dependendo de outros estilos definidos no componente, esta pode ou não ser a dimensão final do nó.percentageDefine a largura ou altura em porcentagem da largura ou altura do pai, respectivamente.
import React, {useState} from 'react';
import {
  View,
  SafeAreaView,
  TouchableOpacity,
  Text,
  StyleSheet,
} from 'react-native';
import type {PropsWithChildren} from 'react';

type Dimension = 'auto' | `${number}%` | number;

const WidthHeightBasics = () => {
  const [widthType, setWidthType] = useState<Dimension>('auto');
  const [heightType, setHeightType] = useState<Dimension>('auto');

  return (
    <PreviewLayout
      widthType={widthType}
      heightType={heightType}
      widthValues={['auto', 300, '80%']}
      heightValues={['auto', 200, '60%']}
      setWidthType={setWidthType}
      setHeightType={setHeightType}>
      <View
        style={{
          alignSelf: 'flex-start',
          backgroundColor: 'aliceblue',
          height: heightType,
          width: widthType,
          padding: 15,
        }}>
        <View style={[styles.box, {backgroundColor: 'powderblue'}]} />
        <View style={[styles.box, {backgroundColor: 'skyblue'}]} />
        <View style={[styles.box, {backgroundColor: 'steelblue'}]} />
      </View>
    </PreviewLayout>
  );
};

type PreviewLayoutProps = PropsWithChildren<{
  widthType: Dimension;
  heightType: Dimension;
  widthValues: Dimension[];
  heightValues: Dimension[];
  setWidthType: (value: Dimension) => void;
  setHeightType: (value: Dimension) => void;
}>;

const PreviewLayout = ({
  children,
  widthType,
  heightType,
  widthValues,
  heightValues,
  setWidthType,
  setHeightType,
}: PreviewLayoutProps) => (
  <SafeAreaView style={{flex: 1, padding: 10}}>
    <View style={styles.row}>
      <Text style={styles.label}>width </Text>
      {widthValues.map(value => (
        <TouchableOpacity
          key={value}
          onPress={() => setWidthType(value)}
          style={[styles.button, widthType === value && styles.selected]}>
          <Text
            style={[
              styles.buttonLabel,
              widthType === value && styles.selectedLabel,
            ]}>
            {value}
          </Text>
        </TouchableOpacity>
      ))}
    </View>
    <View style={styles.row}>
      <Text style={styles.label}>height </Text>
      {heightValues.map(value => (
        <TouchableOpacity
          key={value}
          onPress={() => setHeightType(value)}
          style={[styles.button, heightType === value && styles.selected]}>
          <Text
            style={[
              styles.buttonLabel,
              heightType === value && styles.selectedLabel,
            ]}>
            {value}
          </Text>
        </TouchableOpacity>
      ))}
    </View>
    {children}
  </SafeAreaView>
);

const styles = StyleSheet.create({
  box: {
    width: 50,
    height: 50,
  },
  row: {
    flexDirection: 'row',
    flexWrap: 'wrap',
  },
  button: {
    padding: 8,
    borderRadius: 4,
    backgroundColor: 'oldlace',
    alignSelf: 'flex-start',
    marginRight: 10,
    marginBottom: 10,
  },
  selected: {
    backgroundColor: 'coral',
    shadowOpacity: 0,
    borderWidth: 0,
  },
  buttonLabel: {
    fontSize: 12,
    fontWeight: '500',
    color: 'coral',
  },
  selectedLabel: {
    color: 'white',
  },
  label: {
    textAlign: 'center',
    marginBottom: 10,
    fontSize: 24,
  },
});

export default WidthHeightBasics;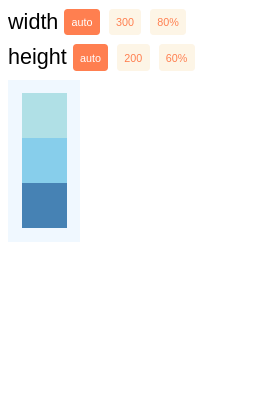
Layout Absoluto e Relativo
O tipo de position de um elemento define como ele é posicionado em seu pai.
relative(valor padrão) Por padrão, um elemento é posicionado relativamente. Isso significa que um elemento é posicionado de acordo com o fluxo normal do layout e, em seguida, deslocado em relação a essa posição com base nos valorestop,right,bottomeleft. O deslocamento não afeta a posição de nenhum elemento irmão ou pai.absoluteQuando posicionado de forma absoluta, um elemento não participa do fluxo normal do layout. Em vez disso, é apresentado independente de seus irmãos. A posição é determinada com base nos valores superior, direito, inferior e esquerdo.
import React, {useState} from 'react';
import {View, TouchableOpacity, Text, StyleSheet} from 'react-native';
import type {PropsWithChildren} from 'react';

const PositionLayout = () => {
  const [position, setPosition] = useState<'relative' | 'absolute'>('relative');

  return (
    <PreviewLayout
      label="position"
      selectedValue={position}
      values={['relative', 'absolute']}
      setSelectedValue={setPosition}>
      <View
        style={[
          styles.box,
          {
            top: 25,
            left: 25,
            position,
            backgroundColor: 'powderblue',
          },
        ]}
      />
      <View
        style={[
          styles.box,
          {
            top: 50,
            left: 50,
            position,
            backgroundColor: 'skyblue',
          },
        ]}
      />
      <View
        style={[
          styles.box,
          {
            top: 75,
            left: 75,
            position,
            backgroundColor: 'steelblue',
          },
        ]}
      />
    </PreviewLayout>
  );
};

type PreviewLayoutProps = PropsWithChildren<{
  label: string;
  values: Array<'relative' | 'absolute'>;
  selectedValue: string;
  setSelectedValue: (value: 'relative' | 'absolute') => void;
}>;

const PreviewLayout = ({
  label,
  children,
  values,
  selectedValue,
  setSelectedValue,
}: PreviewLayoutProps) => (
  <View style={{padding: 10, flex: 1}}>
    <Text style={styles.label}>{label}</Text>
    <View style={styles.row}>
      {values.map(value => (
        <TouchableOpacity
          key={value}
          onPress={() => setSelectedValue(value)}
          style={[styles.button, selectedValue === value && styles.selected]}>
          <Text
            style={[
              styles.buttonLabel,
              selectedValue === value && styles.selectedLabel,
            ]}>
            {value}
          </Text>
        </TouchableOpacity>
      ))}
    </View>
    <View style={styles.container}>{children}</View>
  </View>
);

const styles = StyleSheet.create({
  container: {
    flex: 1,
    marginTop: 8,
    backgroundColor: 'aliceblue',
    minHeight: 200,
  },
  box: {
    width: 50,
    height: 50,
  },
  row: {
    flexDirection: 'row',
    flexWrap: 'wrap',
  },
  button: {
    paddingHorizontal: 8,
    paddingVertical: 6,
    borderRadius: 4,
    backgroundColor: 'oldlace',
    alignSelf: 'flex-start',
    marginHorizontal: '1%',
    marginBottom: 6,
    minWidth: '48%',
    textAlign: 'center',
  },
  selected: {
    backgroundColor: 'coral',
    borderWidth: 0,
  },
  buttonLabel: {
    fontSize: 12,
    fontWeight: '500',
    color: 'coral',
  },
  selectedLabel: {
    color: 'white',
  },
  label: {
    textAlign: 'center',
    marginBottom: 10,
    fontSize: 24,
  },
});

export default PositionLayout;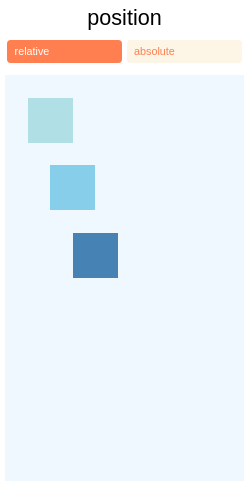
Indo mais fundo
Confira o playground interativo de ioga que você pode usar para entender melhor o flexbox.
Abordamos o básico, mas existem muitos outros estilos que você pode precisar para layouts. A lista completa de adereços que controlam o layout está documentada aqui.
Além disso, você pode ver alguns exemplos dos Engenheiros da Wix.